Riyas P.K-Fab Academy 2016
Computer-controlled machining
The assignment for this week is to "make something big" using Computer-controlled machine. Here we have a shopbot machine.I have seen it working,such a precise machine. I need to make something big and useful.
Design
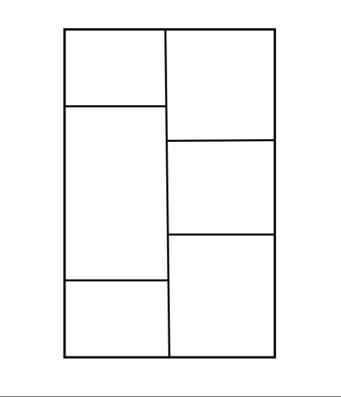
I decided to make a simple shelf to showcase our works (mainly 3d printed). First I made a basic sketch of the shelf using photoshop.
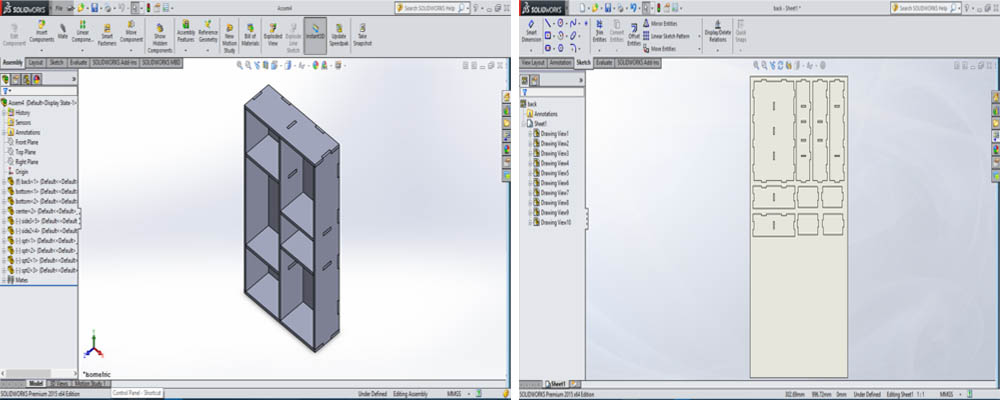
Then as always I began to design parts seperately in Solidworks and saved them.After some tips from my colleague Athif I decided to change the design into press fit. I used drawing in Solidworks to create the cutting file. I set the drawing sheet size same as the plywood sheet, then placed the required parts in it. And finally saved it in dxf file format.You can save it as dwg file as well.
Machining
I used a 12mm plywood to make the shelf.For properly utilizing the sheet some of my parts are cut on a sheet used before, rest is cut on a fresh one.For program the shopbot machine we use "VCarve pro Shopbot edition".I exported the dxf file to Vcarve.For the slots to be fit together we need to add holes at the corners of slots (for drilling).If you are using a used plywood you need to place the parts at unused area, for this you have to know the dimension of the used area (you can measure it).
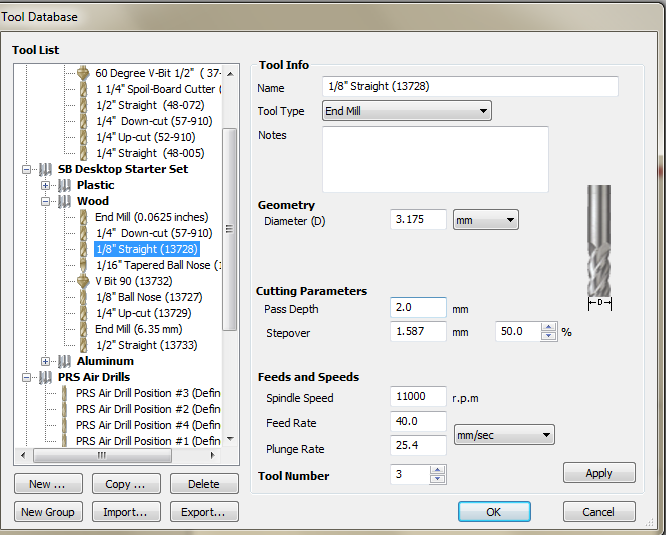
Then select these circles only and click the drill toolpath option.Thus this paths are saved, next thing is to cut the inside slots (if any) now select that paths and set the tool and it parameters.Next is to do these for main design.And the final thing is to add tabs.Tool properties such as diameter,speed,feed rate etc. can be changed in tool database which can be accesed from tool paths.
Save this as .sbp file format.You can simulate the process in Vcarve.Now you are all set for machining, ensure the plywood is properly aligned and fixed.Switch on the machine.Then open the saved sbp file using Shopbot software.First thing to do is set the origin(X=0,Y=0).First you have to click the reset button (blue) on control switch.Move the spindle using the arrow keys and place it at desired postion (for a fresh sheet set it at the atmost corner), then click on the 'zero axes' and tick X and Y.Next thing is to set Z axis for this you have to use a plate and aligator clip which is in the machine itself.Place the plate under drill bit and put the clip on it now click Z axis,the drill bit moves back and forth twice.Remove the clip and plate this finishes the setting up.Now load the file using "cut part" and click "start" this brings a popup to press the start button.Press the green button of control switch to start the spindle,then click "ok".This starts the machining.
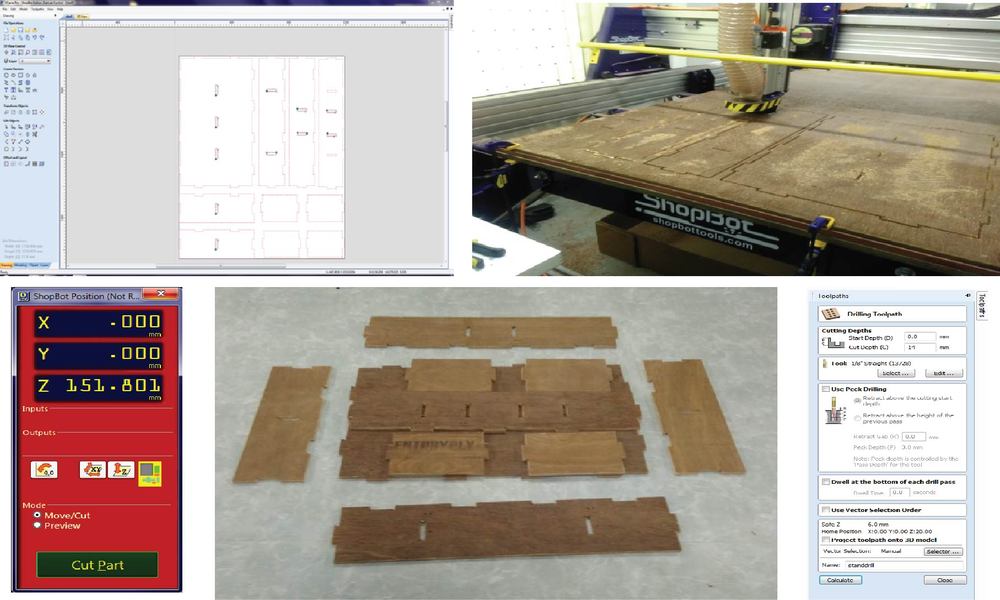
After finishing up the machining you need to remove the tabs to pick the parts.Then cleaning comes up, the parts may have rough edges it can be removed using sandpaper.
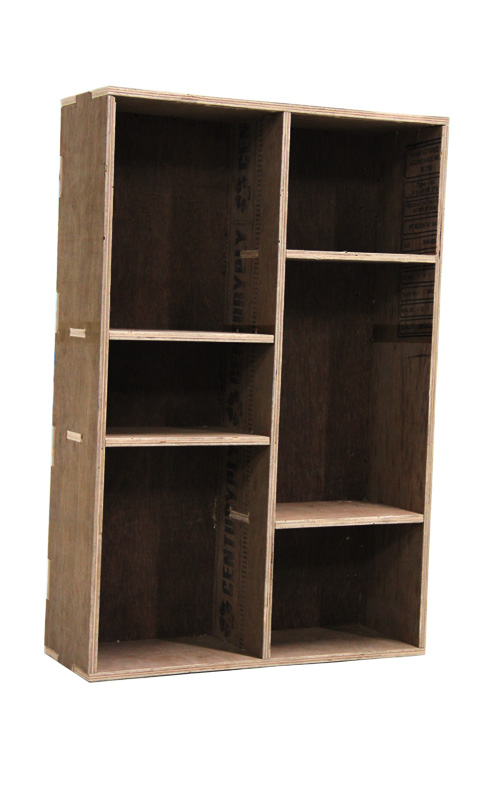
After cleaning I put my shelf's pieces together, I was surprised it fit well even though I didn't leave any tolerances.I realized that this is not the proper way to do the assignment so, later I made a test piece.
Testing the fit.(update)
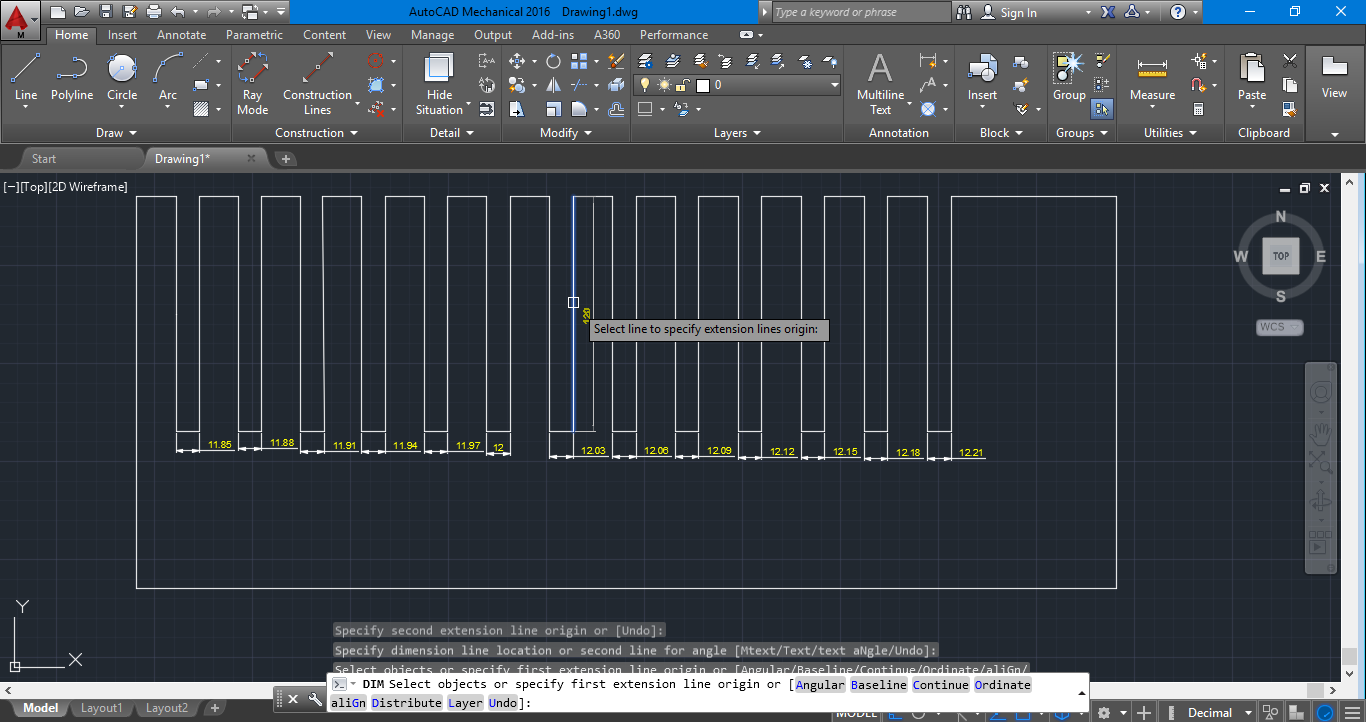
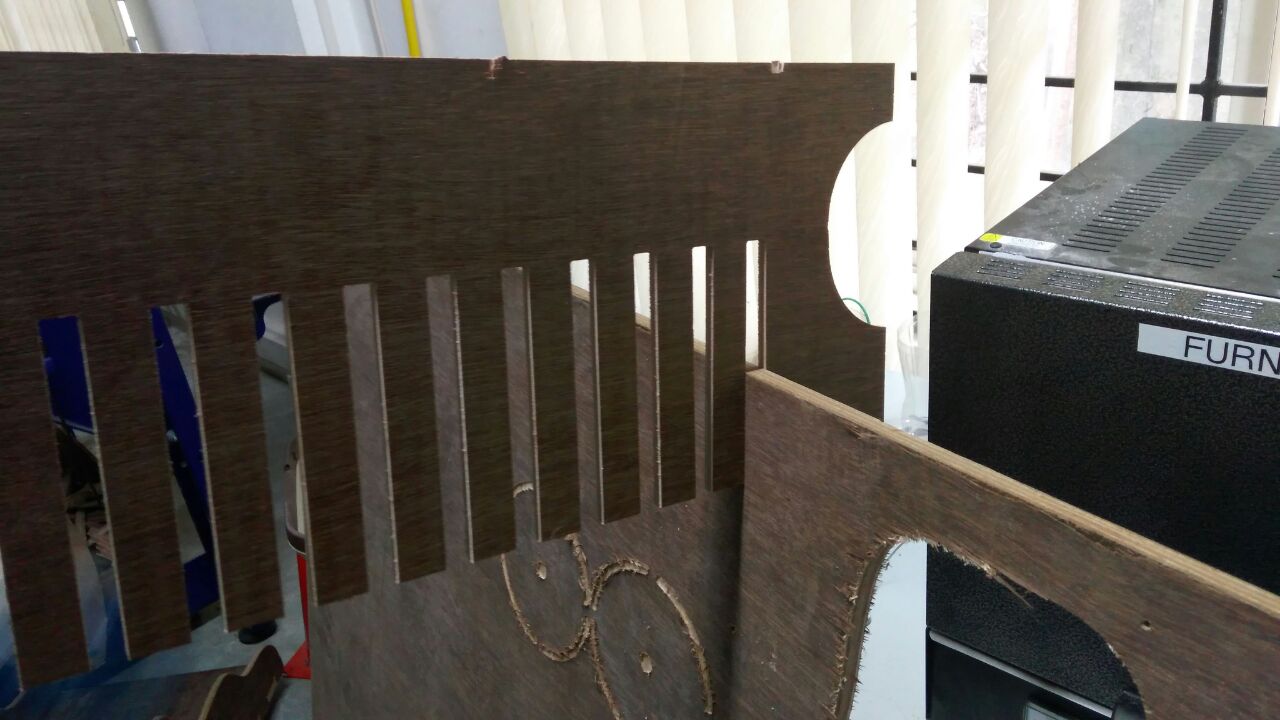
Before going into the design I need to find the perfect fit of the plywood that I am going to be used (12 mm).So similar to computer controlled cutting week I decided to make a plywood scale comb.First I draw it on Autocad and exported it as a dxf file.
Then using default settings (speed,feed rate) I machined the scale comb in shopbot using a leftover piece of plywood which have a thickness of 6mm.
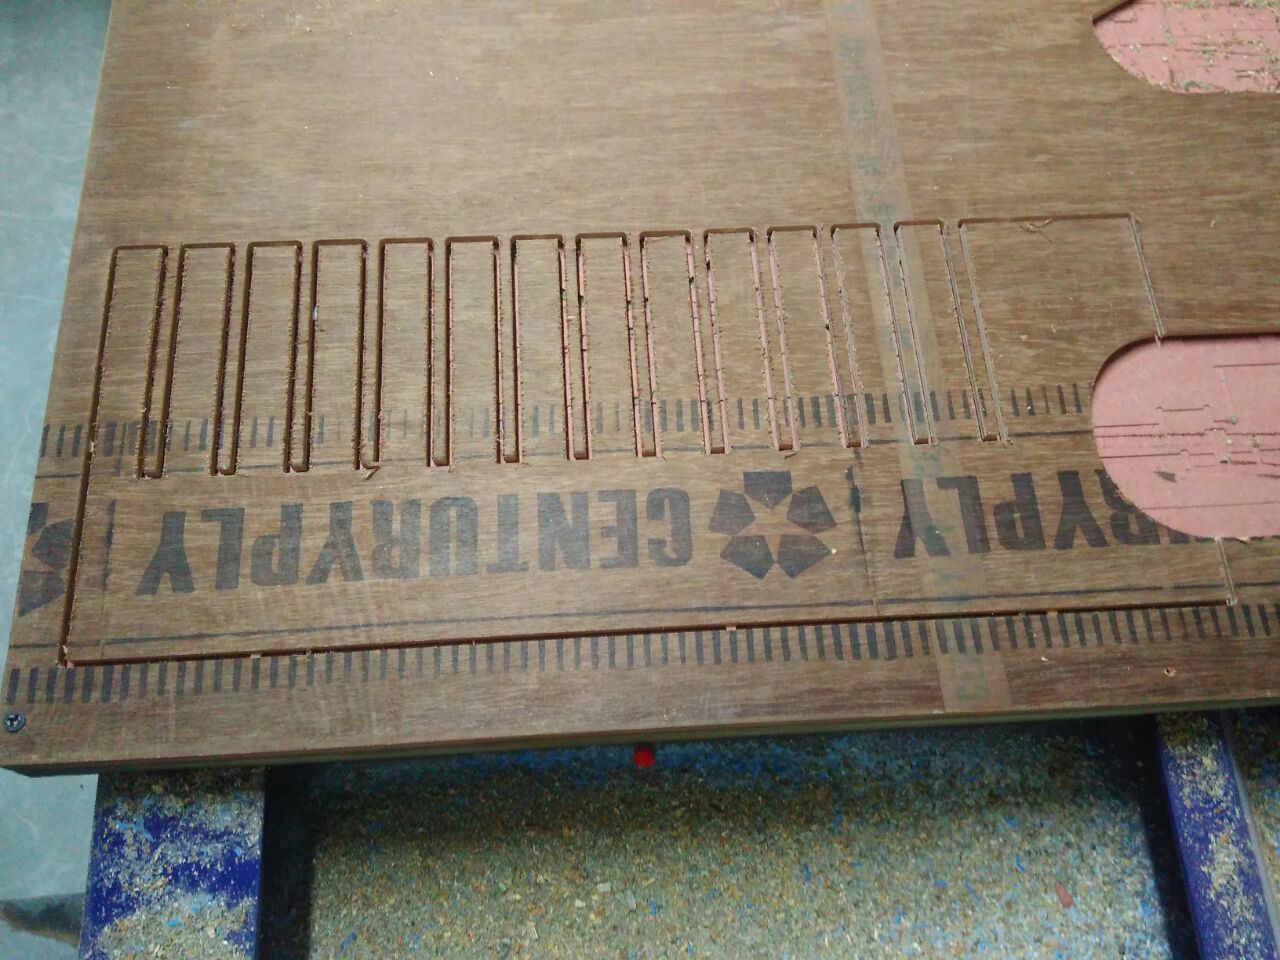
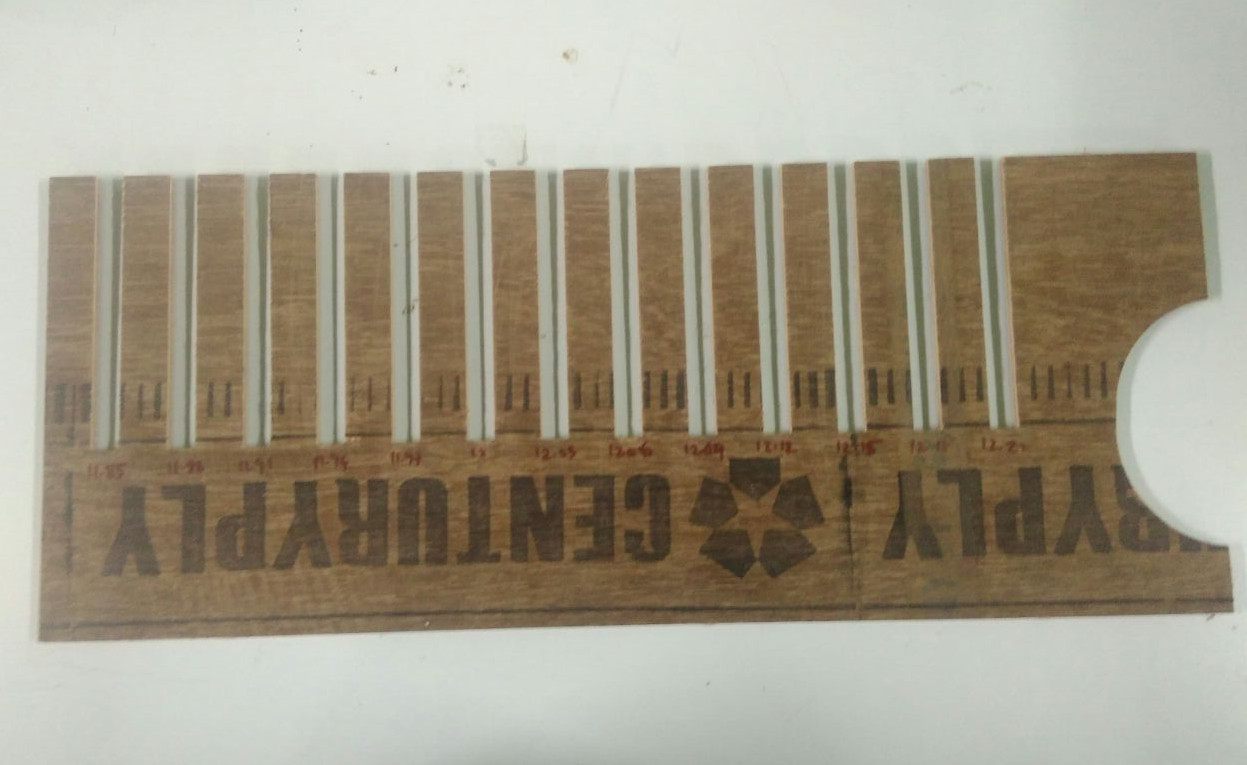
Then using this scale comb I found out the perfect fit for a 12mm plywood which is I am going to use for my assignment.The value is 12.21mm.
Things to be noted:
- Always warm up the spindle before use it for machining.
- Use enough screws/clips to hold the sheet tight.
- Use enough tabs.
- Atleast one person should be present near the shopbot during machining.
Related files
- Assembled design in soid works format - shelf.SLDASM
- The overall shelf design in dxf format - shelf.dxf